Pumpkin carving is a timeless Halloween tradition, but traditional triangle eyes and jagged grins are just the beginning. Whether you want an intricate masterpiece that stuns your neighbors, a whimsical character design, or a clever carving hack that uses the pumpkin’s natural shape, here are 10 creative pumpkin carving ideas to elevate your Halloween decor.

1. The Classic Silhouetted Haunted House
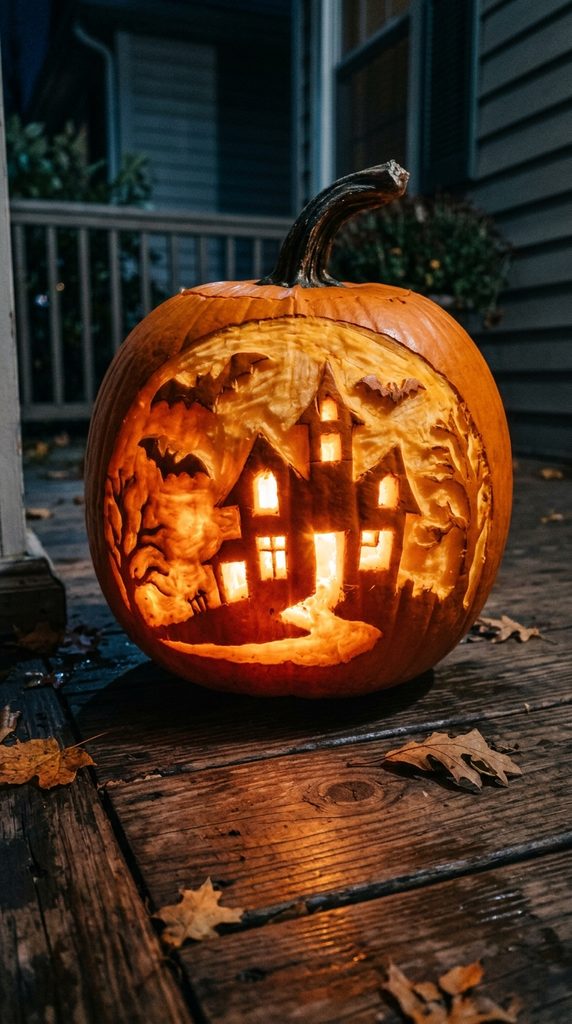
Create a moody, storybook nighttime scene by carving a detailed silhouette into the side of your pumpkin.
- The Design: Draw a spooky haunted house with crooked windows, a crescent moon, and flying bats on one side of the pumpkin. Instead of carving all the way through, scrape away the outer skin (shaving it down) so the windows glow warmly when lit from inside, while the house remains dark.
- The Vibe: Elegant, atmospheric, and reminiscent of a classic storybook illustration.
2. The Drunk (or Sick) Pumpkin
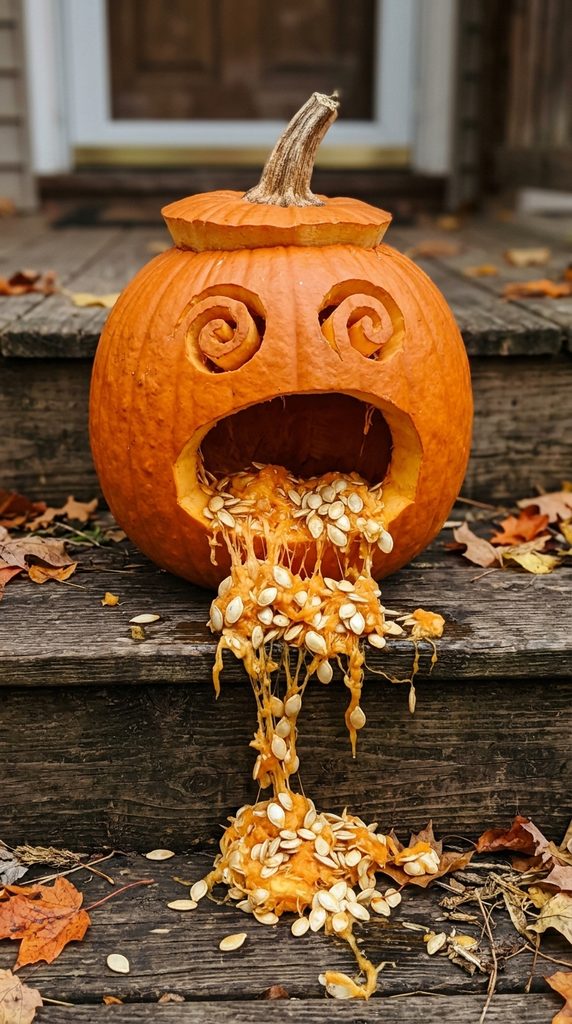
A hilarious, lighthearted carving idea that uses the pumpkin’s natural contents for a funny visual gag.
- The Design: Carve a funny, dizzy facial expression with wide, swirly eyes and an open, groaning mouth. Position the pumpkin so that the pulp and seeds are spilling directly out of its mouth onto the porch or table.
- The Vibe: Silly, gross-out humor that always gets a big laugh from trick-or-treaters.
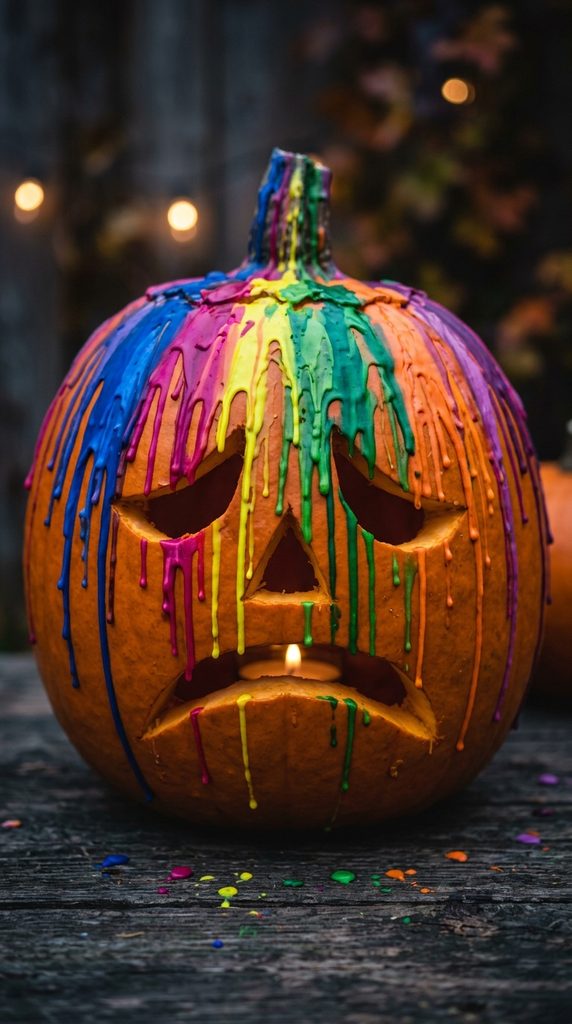
3. The “Crying” Pumpkin with Melted Crayons
Add vibrant streams of color to your jack-o’-lantern for a striking modern art effect.
- The Design: Carve a simple sad face with wide-open eyes and a downturned mouth. Attach colorful wax crayons to the top rim of the pumpkin using a hot glue gun, aligning them just above the carved eyes and forehead.
- The Vibe: Use a hairdryer on high heat to melt the crayons downward so they stream colorful “tears” and wax streaks down the pumpkin’s face.
4. Layered 3D Cat Silhouette
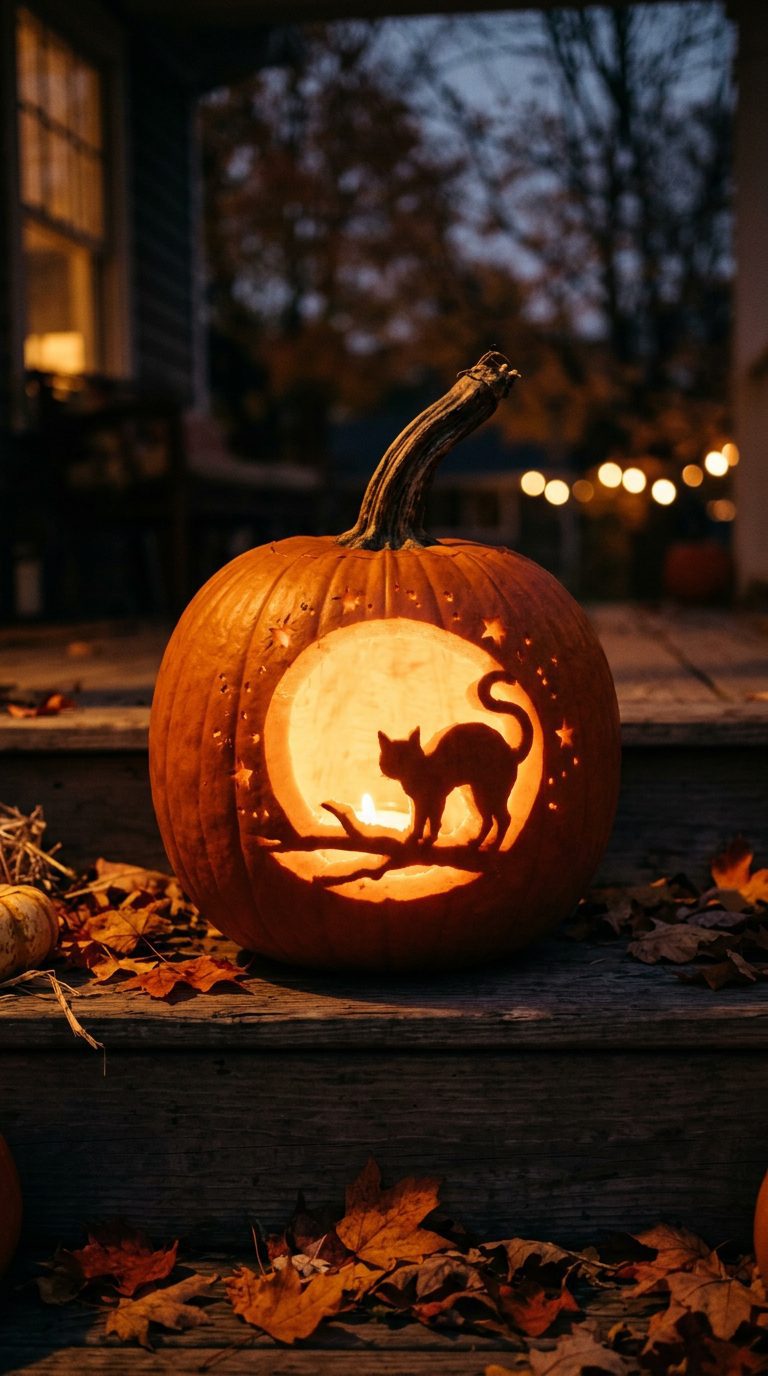
Use depth and shading to create a stunning dimensional design without complex carving tools.
- The Design: Carve a large, bright full moon into the front of the pumpkin. Next to or overlapping the glowing circle, carve out the detailed silhouette of a cat arching its back with its tail raised.
- The Vibe: Clean, modern, and visually striking, especially when placed on a dark porch.
5. The Vampire Pumpkin with Fangs & Fruit
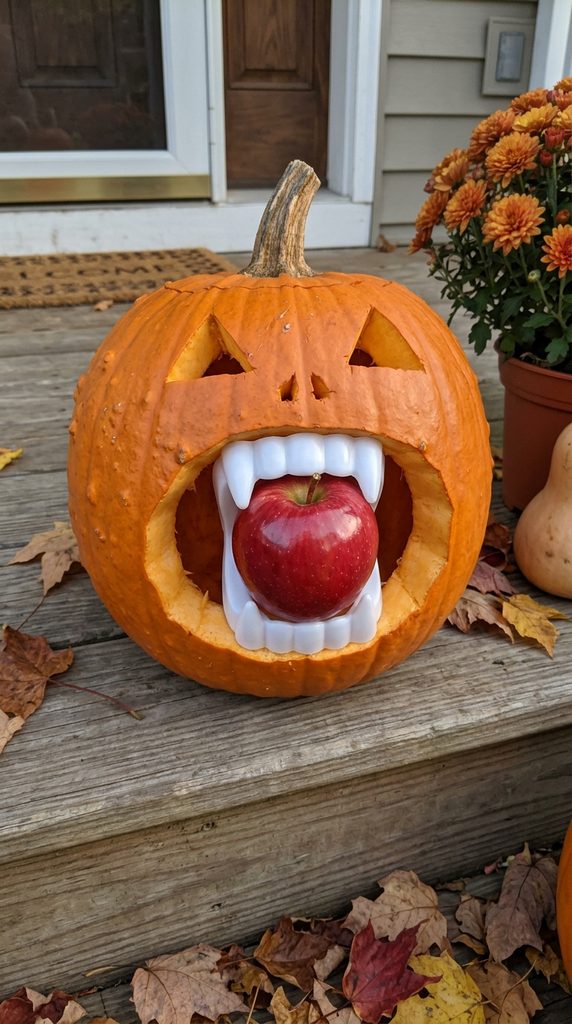
Turn your pumpkin into a stylish nocturnal creature by incorporating real props into the design.
- The Design: Carve a wide-open grinning mouth and insert fake plastic vampire fangs into the opening. To complete the look, place a small red apple or a plastic toy in its mouth so it looks like it just caught a snack.
- The Vibe: Playful, slightly spooky, and very fun for families with younger kids.
6. The Celestial Constellation Pumpkin
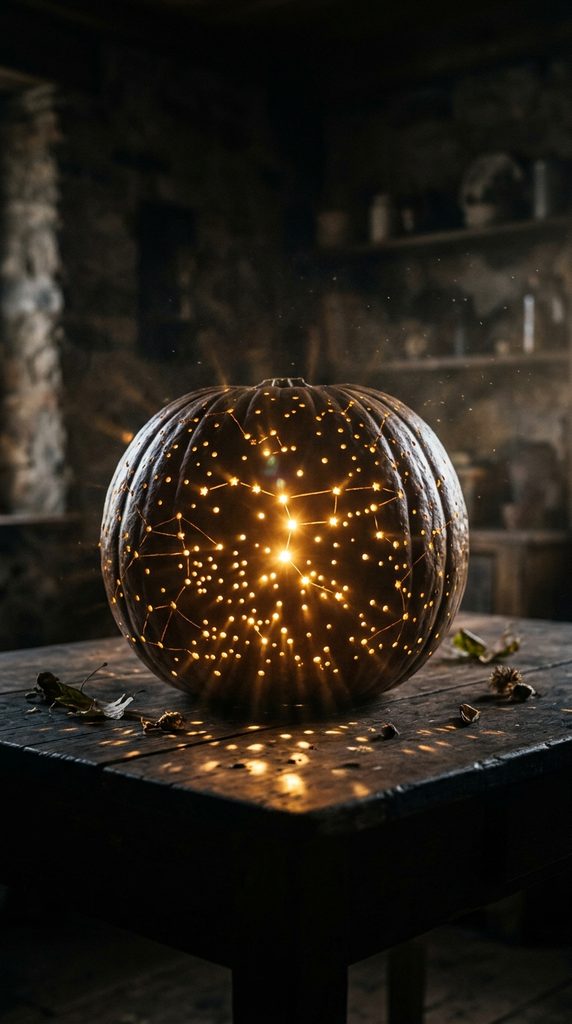
Ditch the traditional face entirely and turn your pumpkin into a glowing night sky.
- The Design: Instead of using a carving knife, use a drill with various bit sizes (or a hammer and nail) to puncture patterns representing constellations like the Big Dipper, Orion, or zodiac signs.
- The Vibe: When lit from inside, the tiny holes project glowing starlight patterns across your porch walls and ceiling.
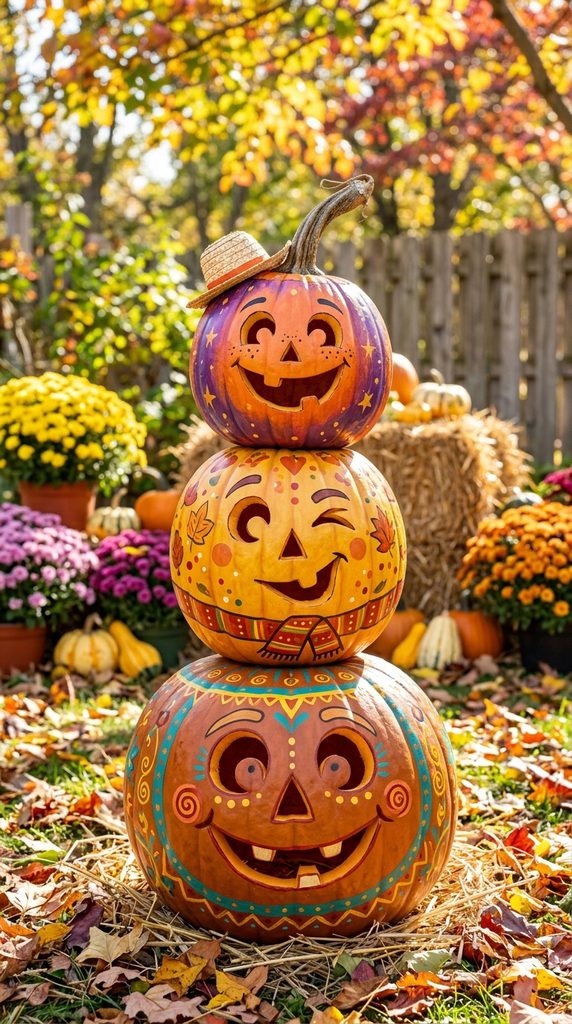
7. The Stacked “Caterpillar” Pumpkin Trio
Combine multiple pumpkins of varying sizes into a whimsical sculpture rather than carving a single gourd.
- The Design: Stack three small-to-medium pumpkins vertically using a wooden dowel for stability. Carve small, cheerful expressions on each pumpkin so they form a friendly character totem pole. Paint them in bright pastel or metallic colors.
- The Vibe: Unique, colorful, and stands out from traditional orange porch jack-o’-lanterns.
8. The Geometric Mandala Pumpkin
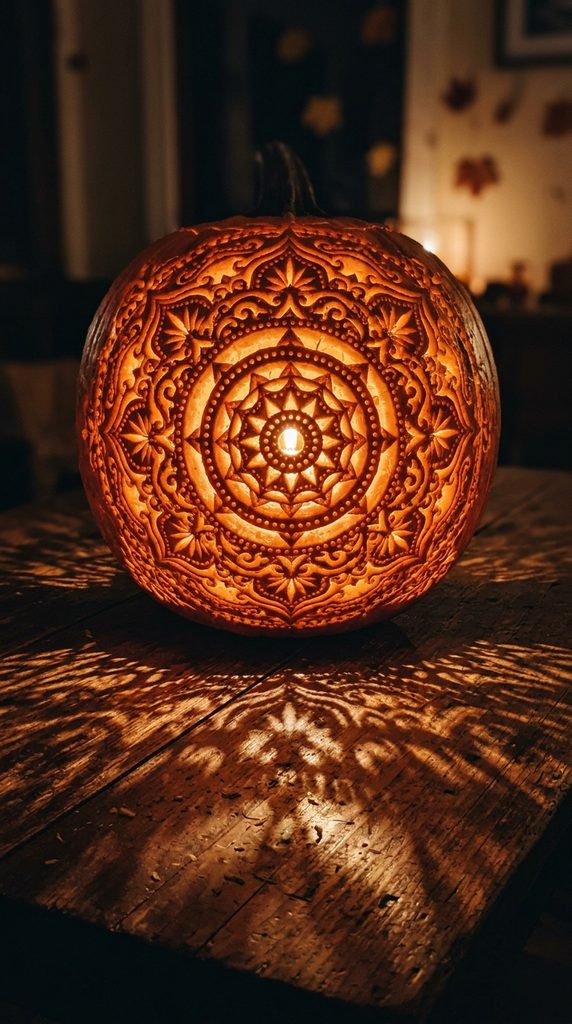
Bring intricate, meditative patterns to your Halloween decor with repetitive geometric shapes.
- The Design: Sketch a symmetrical mandala or geometric lace pattern onto the pumpkin using a stencil and marker. Carefully carve out the negative space using a precision hobby knife (X-Acto knife).
- The Vibe: Sophisticated and bohemian, looking more like an art piece than a spooky decoration once lit up.
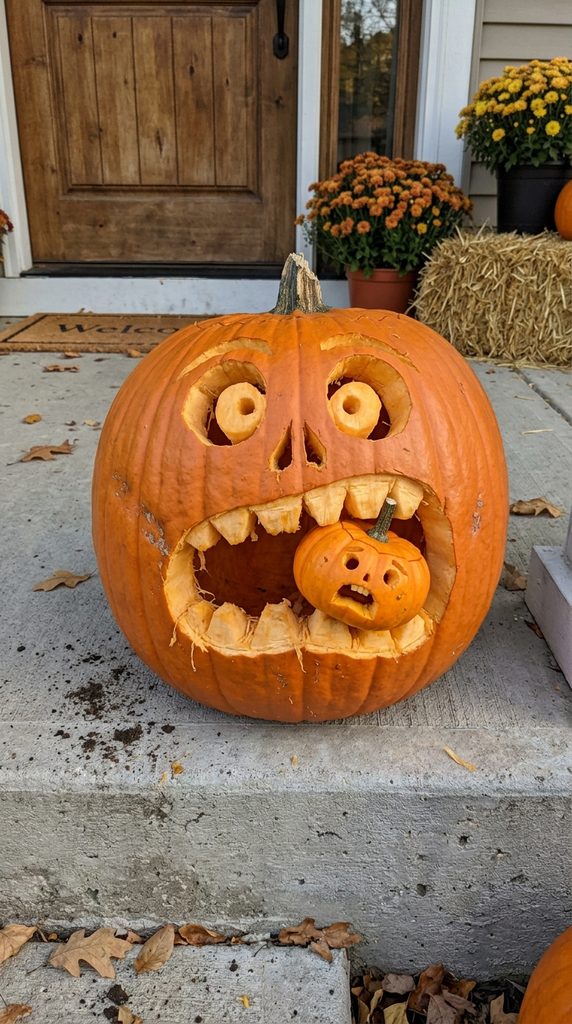
9. The “Cannibal” Pumpkin (Pumpkin Eating Pumpkin)
A clever, humorous design that involves two pumpkins of different sizes interacting.
- The Design: Take a large pumpkin and carve a giant, shocked face with an enormous open mouth. Place a smaller, terrified mini pumpkin directly inside its mouth so it looks like the big pumpkin is “eating” the little one.
- The Vibe: Clever, funny, and a great conversation piece for your front steps.
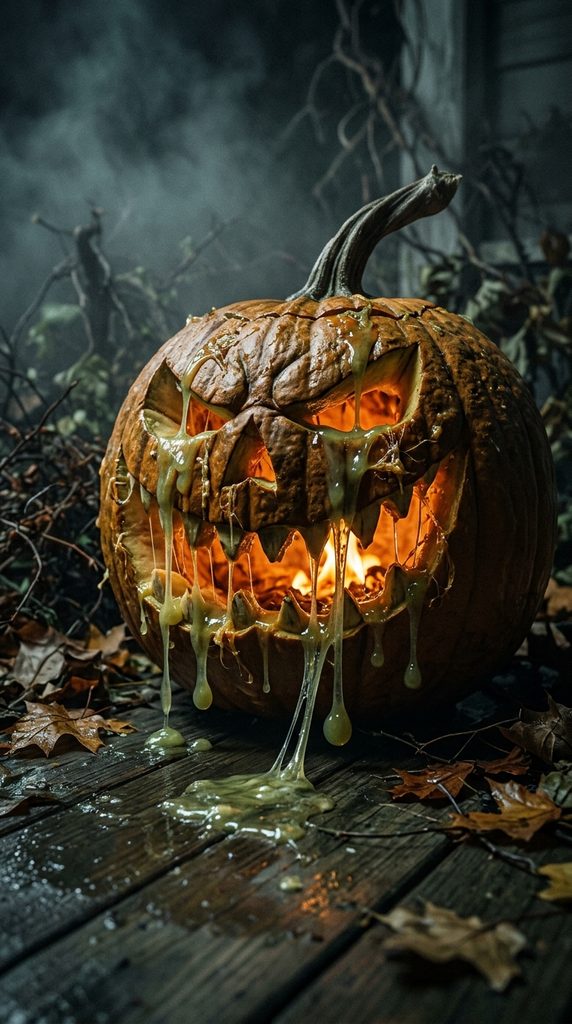
10. The Dripping Slime or Melted Wax Pumpkin
Give your pumpkin an eerie, sci-fi texture inspired by alien ooze or melting wax candles.
- The Design: Carve jagged, uneven teeth and eyes, but extend the carved lines downward from the mouth and eyes in long, wavy drip shapes resembling melting wax or dripping slime.
- The Vibe: Creepy, textured, and perfect for a classic haunted house aesthetic.
Essential Tips for Pumpkin Carving Success
- Wait Until Closer to Halloween: Carved pumpkins typically last 3 to 5 days before starting to rot or shrivel. Carve yours 2 to 3 days before Halloween for the freshest look.
- Scrape the Walls Thin: Scrape the inside wall where you plan to carve down to about 1 inch thick. This makes it much easier to push the knife through the rind.
- Preserve with Petroleum Jelly: Rub a thin layer of petroleum jelly or vegetable oil over all the cut edges of the pumpkin to lock in moisture and prevent dehydration.
Conclusion
Pumpkin carving is a wonderful way to let your creativity shine during the autumn season. Whether you opt for a hilarious gag design, a starry constellation, or a classic haunted silhouette, a well-carved pumpkin adds instant magic to your Halloween celebrations.